
An introduction to vibe.d: Writing a scalable chat room service in D
An introduction to vibe.d: Writing a scalable chat room service in D
Mon, 04 Jan 2016This tutorial aims to give a practical high level introduction to web development in D. It leverages the functionality of vibe.d, such as its HTTP server, the WebSocket handler, the Redis client, and its high level web application framework. For this reason we'll also touch the features of the language at a higher level, without going into every little detail.
Why use D?
There are a lot of traits that make D a good choice for a broad range of tasks. Perhaps the biggest strength of the language is its expressiveness. It offers imperative, object oriented, functional and very powerful compile-time meta programming paradigms. Together they often open up interesting symbiotic possibilities and offer a surprisingly unrestrained environment to put ideas into practice. Something that tends to be a huge productivity boost.
The compile time features, such as static reflection, user defined attributes, (string) mixins and string imports, make it possible to do things that would typically be restricted to dynamically typed languages. The prime example in this article is the declarative web framework with support for dynamically generated HTML pages using a template language that is actually compiled into machine code together with the rest of the program.
The fact that this all works with natively compiled code and static typing means that it has an edge in performance and static code correctness over dynamically typed languages - while still being able to express ideas in the same convenient representations. Oh, and on top of the static type system, D has built-in support for unit tests and function contracts, too, so that it really facilitates writing robust code.
Similar to Rust, it also supports compiler checked memory safety, which is an important asset to have when developing web services. The main differences to Rust are that this is an opt-in feature using the @safe attribute, and that unfortunately support for safe borrowing and reference counting is still missing (but in the works). In case of the former, vibe.d includes a proof-of-concept implementation in the form of an Isolated!T template.
Finally, the reason for the vibe.d toolkit being born, D comes with support for fibers (aka "green threads" and similar to coroutines). Vibe.d uses those together with an event loop for doing asynchronous I/O to offer something very close to Go's goroutines, called "tasks". Huge numbers of tasks can run in the same thread, each in their own fiber. Whenever a task has to wait for some operation to finish - usually I/O, such as waiting for data from a TCP connection - it will automatically yield its fiber and lets other tasks execute instead.
But fibers use only a fraction of resources compared to a full thread and a context switch between different fibers is cheap compared to switching between threads. They also make the use of mutexes unnecessary to avoid data races, which further reduces the overhead (but there are special mutexes available to avoid higher level race conditions). For programs that are I/O bound, this means that a huge throughput can be achieved with minimum resource usage and maximum performance. But of course multi-threading can be combined with this to achieve even higher throughput, or to better distribute CPU heavy computations across CPU cores.
So let's go and take a look at how these features look in practice. Or rather, based on the clean syntax and the abstraction facilities, how invisible these things usually are, and thus how much one can focus on the actual problem, when implementing applications.
Prerequisites
To try out this tutorial, you need to have a working D language environment. This means that the latest versions of the DMD compiler, as well as the DUB package manager should be installed. On non-Windows systems you may also need to install libevent and possibly OpenSSL. See the vibe.d README.
For the last two sections, a running Redis instance is required.
Creating the project
We'll start off by invoking dub init on the command line to create the skeleton for our application in a sub folder of the the current directory:
$ dub init webchat -t vibe.d
Successfully created an empty project in 'C:\Users\sludwig\Develop\webchat'.
This creates a very basic vibe.d based web application package that starts up a HTTP server and shows a single welcome page. The source code is in source/app.d:
import vibe.d;

void main()
{
	auto settings = new HTTPServerSettings;
	settings.port = 8080;
	settings.bindAddresses = ["::1", "127.0.0.1"];
	listenHTTP(settings, &hello);

	logInfo("Please open http://127.0.0.1:8080/ in your browser.");

	runApplication();
}

void hello(HTTPServerRequest req, HTTPServerResponse res)
{
	res.writeBody("Hello, World!");
}
As you can see, the code is all very straight forward and so far with few D specifics. The main() fuction will be executed automatically when the application starts, very similar to C/C++. runApplication starts the event loop and blocks until the application exits.
We can now run the application by simply invoking dub in the project directory:
$ cd webchat
$ dub
Performing "debug" build using dmd for x86.
Target vibe-d 0.7.23+commit.102.g911b811 is up to date. Use --force to rebuild.
Building webchat ~master configuration "application"...
Linking...
Copying files for vibe-d...
Running .\webchat.exe
Listening for HTTP requests on ::1:8080
Listening for HTTP requests on 127.0.0.1:8080
Please open http://127.0.0.1:8080/ in your browser.
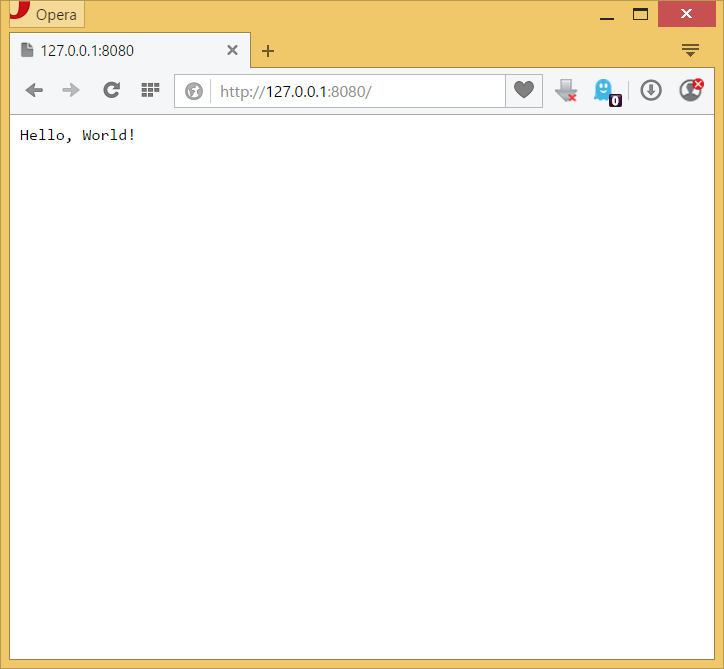
Opening this address in the browser shows the following output:
Defining the basic application outline
Now that we have a basic web application running, we can start to add some structure and introduce different HTTP request handlers for different request paths. The first thing to do is to remove the hello function and instead add a class that will be registered as a web interface. To be able to use client side scripts and CSS files later, we'll also add a catch-all route that looks for files in the public/ folder for any request that didn't match one of the other routes.
final class WebChat {
	// GET /
	void get()
	{
		render!"index.dt";
	}
}

void main()
{
	// the router will match incoming HTTP requests to the proper routes
	auto router = new URLRouter;
	// registers each method of WebChat in the router
	router.registerWebInterface(new WebChat);
	// match incoming requests to files in the public/ folder
	router.get("*", serveStaticFiles("public/"));

	auto settings = new HTTPServerSettings;
	settings.port = 8080;
	settings.bindAddresses = ["::1", "127.0.0.1"];
	// for production installations, the error stack trace option should
	// stay disabled, because it can leak internal address information to
	// an attacker. However, we'll let keep it enabled during development
	// as a convenient debugging facility.
	//settings.options &= ~HTTPServerOption.errorStackTraces;
	listenHTTP(settings, router);
	logInfo("Please open http://127.0.0.1:8080/ in your browser.");

	runApplication();
}
registerWebInterface is the entry point to vibe.d's high-level web application framework. It takes a class instance and registers each of its public methods as a route in the URLRouter. By default, the method names are mapped to HTTP verbs and paths automatically. The first word is converted to the HTTP method and the rest is converted from CamelCase to lower_underscore_notation to yield the path for the route. In our case, get is mapped to a GET request and the matched path is simply "/" because there is no further suffix in the method name. See also the documentation for registerWebInterface for more details.
To make the page rendering work, we still have to add the referenced index.dt to the views/ folder and fill it with some content. The file is formatted as a Diet template, which is a Jade dialect based on embedded D instead of JavaScript. This format removes all of the usual syntax overhead that HTML has, mainly end tags and the angle brackets, making the code much more readable. The Diet template system is included with vibe.d and generally recommended, but there are alternative systems available based on plain text/HTML.
doctype html
html
	head
		title Welcome to WebChat
	body
		h1 Welcome to WebChat
		p Please enter the name of a chat room to join a chat:

		form(action="/room", method="GET")
			p
				label(for="id") Chat room:
				input#id(type="text", name="id", autofocus=true)
			p
				label(for="name") Your name:
				input#name(type="text", name="name")
			button(type="submit") Enter
Now, you may have noticed that the call to render the above template is using compile time (template) arguments instead of normal parameters. In D, template arguments are denoted by !. Parenthesis can be left off if only a single argument is given.
The reason why render takes it's arguments as template parameters is that Diet templates are actually translated into HTML at compile time. Using D's powerful meta-programming abilities, D code is generated from the Diet source code that outputs static HTML code directly to the TCP socket. This means that rendering a Diet template, even if there are dynamic elements inside (see the later sections), is usually as fast as serving a static page from RAM. This means that additional caching is often not necessary.
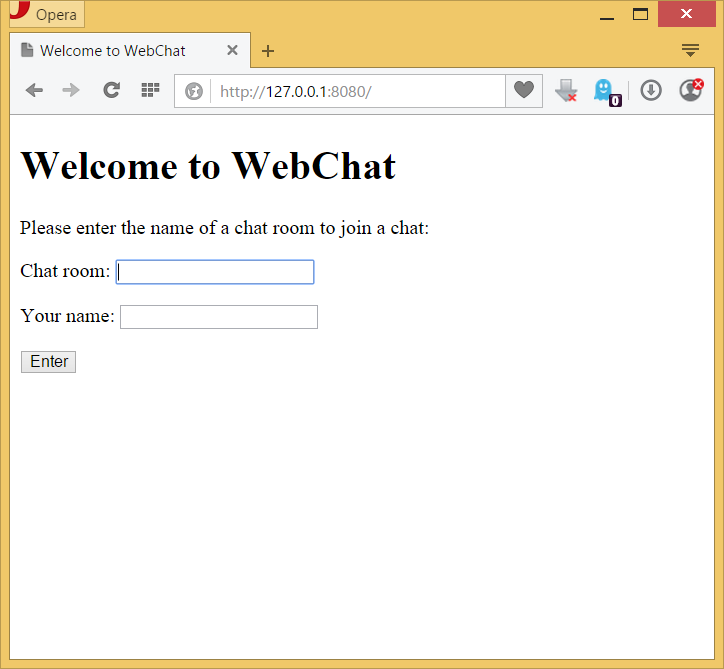
With this in place, running dub and refreshing the browser now yields this:
Now let's create a second route in our WebChat class that handles the submitted form:
void getRoom(string id, string name)
{
	render!("room.dt", id, name);
}
The name of this method is automatically mapped to a GET request to the path "/room". The id and name parameters mean that it will accept form fields with those names passed through the query string. Again, we have to create the corresponding Diet template file, views/room.dt:
doctype html
html
	head
		title #{id} - WebChat
		style.
			textarea, input { width: 100%; }
			textarea { resize: vertical; }
	body
		h1 Room '#{id}'

		textarea#history(rows=20, readonly=true)
		form(action="room", method="POST")
			input(type="hidden", name="id", value=id)
			input(type="hidden", name="name", value=name)
			input#inputLine(type="text", name="message", autofocus=true)
Note the two #{id} elements. These insert the contents of the id variable that was passed to render into the generated HTML code. HTML encoding is automatically used to avoid the inserted text interfering with the HTML structure (XSS attacks).

Implementing a simple form based chat
We already have a form in our room.dt to submit chat messages, so let's add a handler for it:
void postRoom(string id, string name, string message)
{
	// TODO: store the chat message
	redirect("room?id="~id.urlEncode~"&name="~name.urlEncode);
}
This simply redirects back to the chat room, so that multiple messages can be posted in sequence. Note the ~ operator, which is used in D to concatenate strings and arrays. The + operator performs optimized element-wise addition instead ([1, 2] + [3, 4] == [4, 6]).
To get a working prototype, let's first add a simple in-memory store of the message history. Rooms will be created on-demand using the getOrCreateRoom helper method.
final class WebChat {
	private Room[string] m_rooms;

	// ...

	void getRoom(string id, string name)
	{
		auto messages = getOrCreateRoom(id).messages;
		render!("room.dt", id, name, messages);
	}

	void postRoom(string id, string name, string message)
	{
		if (message.length)
			getOrCreateRoom(id).addMessage(name, message);
		redirect("room?id="~id.urlEncode~"&name="~name.urlEncode);
	}

	private Room getOrCreateRoom(string id)
	{
		if (auto pr = id in m_rooms) return *pr;
		return m_rooms[id] = new Room;
	}
}

final class Room {
	string[] messages;

	void addMessage(string name, string message)
	{
		messages ~= name ~ ": " ~ message;
	}
}
Inside room.dt, we can now populate the <textarea> with messages from the history list:
textarea#history(rows=20, readonly=true)
	- foreach (ln; messages)
		|= ln
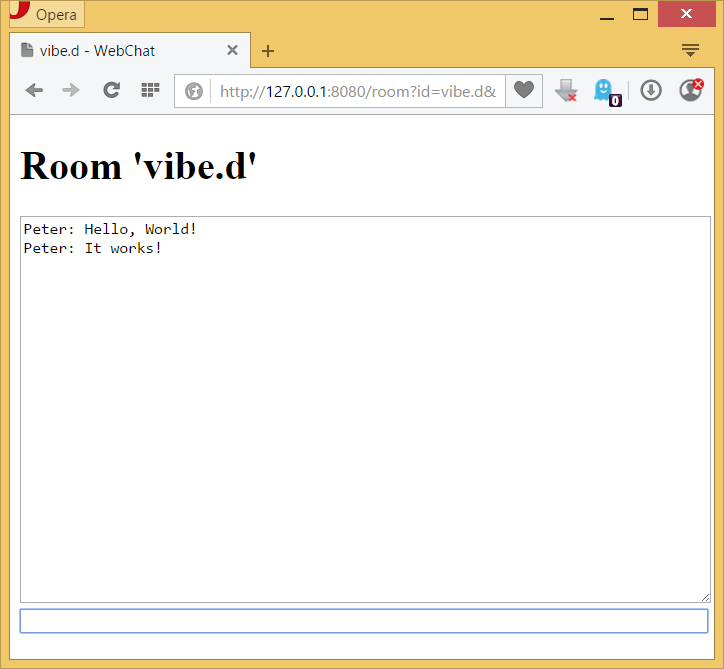
And voilà, there go our first chat messages:
Incremental updates
Now that we have a basic chat going, let's employ some JavaScript and WebSockets to get incremental updates instead of reloading the whole page after each message. This will also give us immediate updates when other clients write messages, so that no manual page reloading is necessary. We start with a new route in WebChat to handle incoming web socket connections:
// GET /ws?room=...&name=...
void getWS(string room, string name, scope WebSocket socket)
{
	auto r = getOrCreateRoom(room);

	auto writer = runTask({
		auto next_message = r.messages.length;

		while (socket.connected) {
			while (next_message < r.messages.length)
				socket.send(r.messages[next_message++]);
			r.waitForMessage(next_message);
		}
	});

	while (socket.waitForData) {
		auto message = socket.receiveText();
		if (message.length) r.addMessage(name, message);
	}

	writer.join(); // wait for writer task to finish
}
Inside of the handler, we first start a background task that will watch the Room for new messages and sends those to the connected WebSocket client. Then we enter a loop to read all messages from the WebSocket. Each message is appended to the list of messages in that room.
For this to work we still have to implement Room.waitForMessage and add a corresponding trigger to addMessage:
final class Room {
	string[] messages;
	LocalManualEvent messageEvent;

	this()
	{
		messageEvent = createManualEvent();
	}

	void addMessage(string name, string message)
	{
		messages ~= name ~ ": " ~ message;
		messageEvent.emit();
	}

	void waitForMessage(size_t next_message)
	{
		while (messages.length <= next_message)
			messageEvent.wait();
	}
}
LocalManualEvent is a simple entity that has a blocking wait() method (it lets other tasks run while waiting), which can be triggered using emit. Many tasks can wait on the same event at the same time.
Now that the backend is ready, we'll have to add some JavaScript to the frontend. The following file, public/scripts/chat.js, simply connects to our WebSocket endpoint and begins to listen for messages. Each message is appended to <textarea>'s contents. The sendMessage function will be the replacement for sending the chat message form. It sends the message over the WebSocket instead of submitting the form and then clears the message field for the next message.
function sendMessage()
{
	var msg = document.getElementById("inputLine")
	socket.send(msg.value);
	msg.value = "";
	return false;
}

function connect(room, name)
{
	socket = new WebSocket("ws://127.0.0.1:8080/ws?room="+encodeURIComponent(room)+"&name="+encodeURIComponent(name));

	socket.onmessage = function(message) {
		var history = document.getElementById("history");
		var previous = history.innerHTML.trim();
		if (previous.length) previous = previous + "\n";
		history.innerHTML = previous + message.data;
		history.scrollTop = history.scrollHeight;
	}

	socket.onclose = function() {
		console.log("socket closed - reconnecting...");
		connect();
	}
}
This now gets integrated into room.dt by appending some script tags within room.dt's <body> element:
- import vibe.data.json;
script(src="scripts/chat.js")
script connect(#{Json(id)}, #{Json(name)})
The #{Json(...)} there uses the JSON module to wrap a string as a Json value and then converts that back to a string. This will create a proper quoted string that, because it's JSON, is also valid JavaScript code.
Finally, the form needs to get an onsubmit attribute, so that the WebSocket code is used instead of actually submitting the form:
form(action="room", method="POST", onsubmit="return sendMessage()")
And that's it, we now have a fast and efficient single-node multi-user chat. Still missing now is persistent storage of the chat messages using an underlying database.
Adding persistence
The final step for completing this little chat application will be to add a persistent storage instead of the ad-hoc in-memory solution that we have so far. We'll be using Redis for this task due to its speed and feature set, and because vibe.d conveniently includes a Redis client driver. The necessary setup looks like this:
final class WebChat {
	private {
		RedisDatabase m_db;
		Room[string] m_rooms;
	}

	this()
	{
		m_db = connectRedis("127.0.0.1").getDatabase(0);
	}

	// ...

	private Room getOrCreateRoom(string id)
	{
		if (auto pr = id in m_rooms) return *pr;
		return m_rooms[id] = new Room(m_db, id);
	}
}
Simple as that. Now let's replace the actual string array of messages with a RedisList!string:
final class Room {
	RedisDatabase db;
	string id;
	RedisList!string messages;
	LocalManualEvent messageEvent;

	this(RedisDatabase db, string id)
	{
		this.db = db;
		this.id = id;
		this.messages = db.getAsList!string("webchat_"~id);
		this.messageEvent = createManualEvent();
	}

	void addMessage(string name, string message)
	{
		messages.insertBack(name ~ ": " ~ message);
		messageEvent.emit();
	}

	void waitForMessage(long next_message)
	{
		while (messages.length <= next_message)
			messageEvent.wait();
	}
}
As we can see, the code still looks almost the same apart from using insertBack instead of the ~= operator for appending messages. RedisList will issue the necessary Redis commands for appending and reading of the list entries.
By the way, since in room.dt we are just iterating over the messages line-by-line, RedisList will read the reply coming from the Redis database lazily and the lines get piped directly through to the HTTP connection while the reply is read from the database. Apart from minimizing the latency of the reply, this also means that the list of messages never has to be actually stored in memory and in theory we could now pass gigabytes of chat history to the client with minimal RAM usage.
Enabling horizontal scaling
Now that we have a fast and persistent chat service running, there is just one thing missing from the initial promise of this tutorial: we need to enable the service to scale horizontally. With regards to the storage, this is basically already done by using a scalable database. The chat rooms can be distributed over multiple database instances, for example by using Redis Cluster. But supposed that this application would grow to millions of users, we also need to handle the case where the web service backend itself has to be scaled by distributing requests over multiple instances (on one or multiple machines). The different instances would have to be able to notify each other about new messages, so we have to extend the basic LocalManualEvent based notification mechanism to something that works across processes.
Fortunately, Redis has a PubSub functionality that we can use here. It consists of named "channels" to which any client can send messages. All clients connected to the database can then subscribe to one or more of those channels and will each receive these messages. For our use case, to keep things simple, we are going to use a single channel to which we will send the names of the rooms that got new messages.
final class WebChat {
	private {
		// ...
		RedisSubscriber m_subscriber;
	}

	this()
	{
		// ...

		m_subscriber = RedisSubscriber(m_db.client);
		m_subscriber.subscribe("webchat");
		m_subscriber.listen((channel, message) {
			if (auto pr = message in m_rooms)
				pr.messageEvent.emit();
		});
	}

	// ...
}

final class Room {
	// ...

	void addMessage(string name, string message)
	{
		this.messages.insertBack(name ~ ": " ~ message);
		this.db.publish("webchat", id);
	}

	// ...
}
All that is necessary to make this work is to publish the name of the chat room as a message in Room.addMessage instead of directly triggering messageEvent, as well as setting up a subscriber for that channel. subscriber.listen() will start a new background task that waits for new messages to arrive in the "webchat" channel and then calls the supplied delegate for each message. Within this callback we simply trigger the messageEvent of the corresponding Room, and we are done.
Conclusion
With the tools presented in this article, you should have all the basics needed to start building your own high-performance web applications. Some aspects, such as user authentication, didn't fit the scope of this single post, but will most likely be part of a follow-up article.
You can find the complete source code for all steps on GitHub: https://github.com/vibe-d/webchat-tutorial
Update 2018-11-05: Updated to use vibe.d 0.8.4 and to define a regular main() instead of relying on VibeDefaultMain
Comments for the post are currently disabled.
7 comments
Yeah, that's definitely the most important feature to add! The Bayes filter in the forum works great b.t.w., I've only had one or two wrong classifications over the last year.
Amazing article, great work as always. It's not always easy to get the architecture right on a chat but this really nails it, simple and concise.
Not spam proof though!
Try adding a honeypot field like
<input type="text" name="firstname" id="firstname" value="">
<script> $('#first_name').style.display = 'none' </script>
I'm running Isso on my blog, should be straightforward to reuse it's nice frontend and write a backend in D ;).
A year later there are finally some news and the comment section is secretly running on the new Diskuto comment engine. Notifications are still TBD at this point, but the rest is there.
;) It's missing a lot of convenience features, though (user edit/delete, notifications etc.). Maybe I'll get to that one day.
As with any comment system, this has to be tried ¯_(ツ)_/¯ <script> alert('please don't work'); </script>